Cheesy Garlic Bread Recipe- Easy & Delicious
BEST CHEESY GARLIC BREAD RECIPE. Let’s be honest, there are few things in this world as universally loved as a warm, gooey slice of cheesy garlic bread. It’s the ultimate comfort food, the perfect appetizer, and the unsung hero of any meal. Whether you’re hosting a dinner party, looking for a crowd-pleasing side dish, or simply craving a savory indulgence, this BEST CHEESY GARLIC BREAD RECIPE is about to become your new obsession. Forget bland, boring bread; we’re talking about a flavor explosion! The magic lies in the perfect harmony of buttery, garlicky goodness meeting a symphony of melted cheese, all baked to golden perfection. What makes this recipe truly special is its effortless simplicity, delivering restaurant-quality results right in your own kitchen. Get ready to ditch those frozen versions and embrace the irresistible aroma and taste of truly homemade cheesy garlic bread.
Why You’ll Love This Recipe:
The ultimate comfort food.
Incredibly easy to make.
Irresistible aroma and flavor.
BEST CHEESY GARLIC BREAD RECIPE
There are few things in this world as comforting and universally loved as a perfectly made cheesy garlic bread. Forget those dry, bland slices you sometimes get. We’re talking about the kind of garlic bread that’s golden brown, unbelievably fragrant, and loaded with gooey, melted cheese. It’s the ultimate side dish, the perfect appetizer, and honestly, sometimes it’s the main event. This recipe focuses on creating that absolute perfection, using a combination of fresh and roasted garlic for maximum flavor, and the unparalleled softness of King’s Hawaiian rolls for an extra touch of magic. Get ready to impress yourself and everyone lucky enough to share this with you.
Ingredients:
Crafting the Ultimate Garlic Butter
The heart of any great garlic bread is, of course, the garlic butter. This recipe elevates it by incorporating both raw and roasted garlic for a complex, nuanced flavor profile. If you haven’t roasted garlic before, it’s incredibly simple. Take a head of garlic, slice off the top to expose the cloves, drizzle with a little olive oil, wrap in foil, and roast at around 400°F (200°C) for 30-40 minutes, until soft and fragrant. The roasted garlic will be sweet and mellow, a beautiful counterpoint to the pungency of the raw garlic.
To begin extract, peel your raw garlic cloves. Finely mince them or pass them through a garlic press. The goal here is to get them as fine as possible so they distribute evenly and don’t leave large, overpowering chunks. In a small bowl, combine the minced raw garlic with the 2 tablespoons of olive oil and a pinch of salt. Let this mixture sit for at least 10 minutes while you prepare the other components. This allows the garlic to infuse the oil and mellow slightly.
Next, we’ll build our rich, creamy garlic butter base. In a medium bowl, whisk together the ½ cup of melted butter, 1 egg, ¼ cup of milk, ½ teaspoon of salt, and ½ teaspoon of paprika. The egg and milk act as emulsifiers, creating a smoother, richer sauce that will cling beautifully to the bread. The paprika adds a subtle warmth and a lovely hint of color. If you’re using roasted garlic, gently squeeze the softened cloves from their skins into this bowl. Mash them lightly with a fork until they form a paste, then whisk them into the butter mixture. Make sure to really break down any lumps for a consistent flavor throughout. Finally, stir in the 2 tablespoons of chopped fresh parsley. This brings a burst of freshness that cuts through the richness of the butter and cheese.
Preparing the Bread for Toasting Glory
Now, for the star of the show: the bread. King’s Hawaiian Origin extractal Sweet Hawaiian Sheet Rolls are truly a game-changer for garlic bread. Their inherent sweetness and incredibly soft texture create a base that absorbs the garlic butter and cheese like a dream, resulting in a loaf that’s tender on the inside and perfectly crisp on the edges. If you’re using a French baguette, slice it lengthwise down the middle, but be careful not to cut all the way through if you want a ‘hinged’ loaf.
For the King’s Hawaiian rolls, you want to keep them in their full sheet form. This is key to creating those irresistible pockets of cheesy goodness. Using a sharp serrated knife, carefully cut slits into the tops of the rolls. Don’t cut all the way through to the bottom – aim to go about two-thirds of the way down. Make these slits about 1 to 1.5 inches apart. This allows the garlic butter to seep down into all those nooks and crannies, ensuring every bite is infused with flavor. If you are using a baguette, simply spread the garlic butter generously over the cut surfaces.
Assembling and Baking Your Masterpiece
With the bread prepped and the garlic butter ready, it’s time for assembly. Using a pastry brush or a spoon, generously coat the tops and sides of the King’s Hawaiian rolls with the prepared garlic butter mixture. Make sure to get plenty into the slits you cut. Don’t be shy; this is where all the flavor lives! If you’re using a baguette, spread it evenly over the cut surfaces.
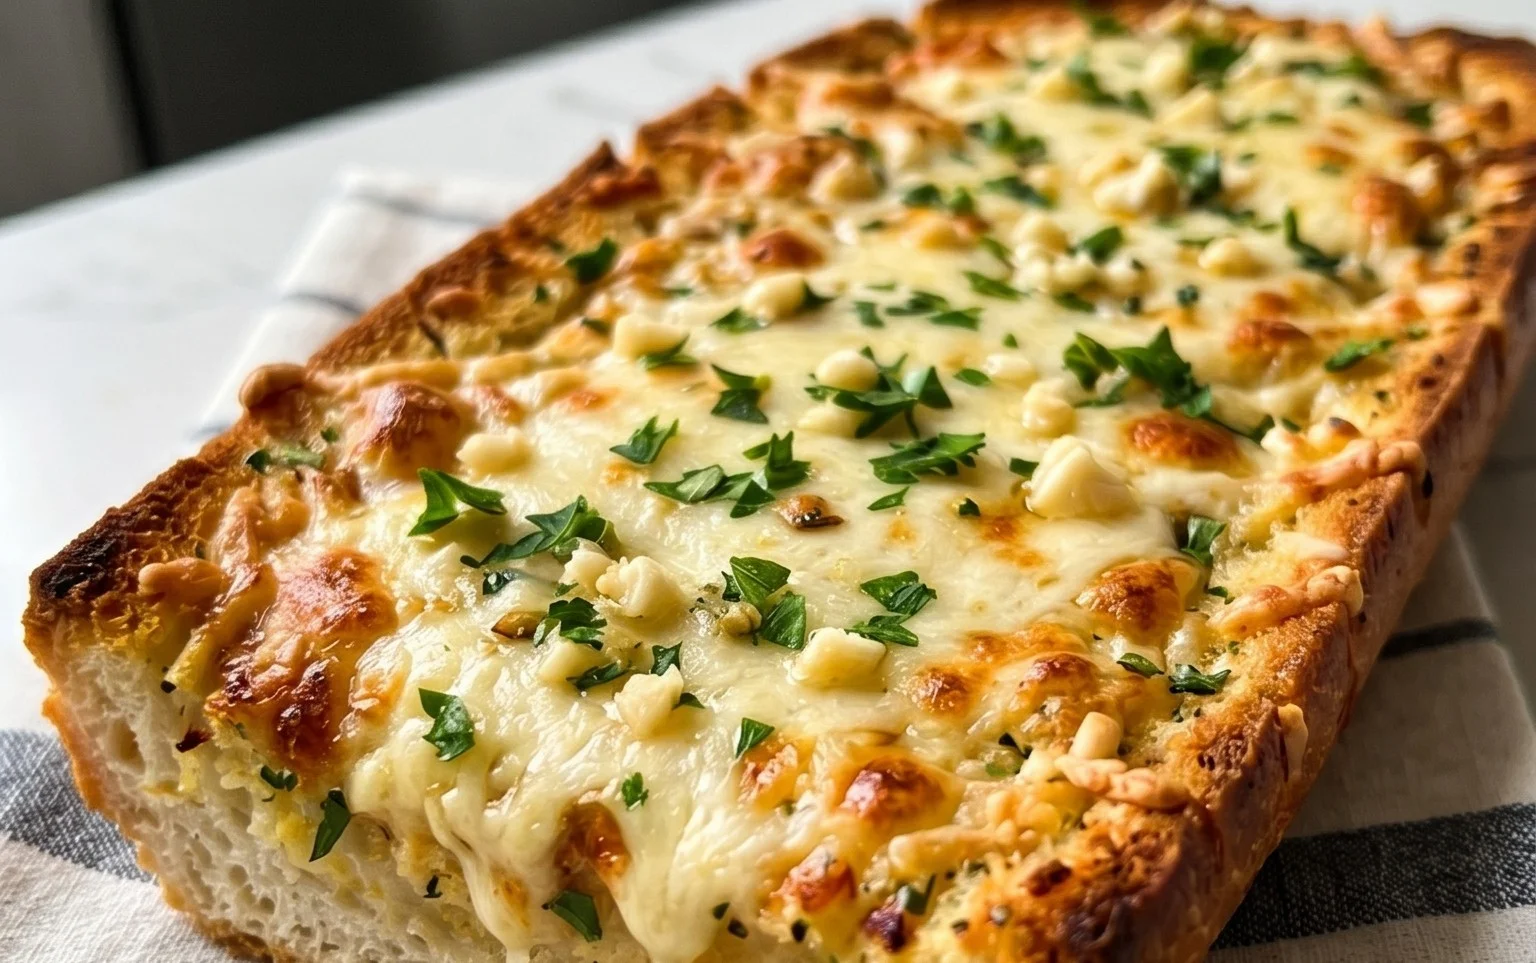
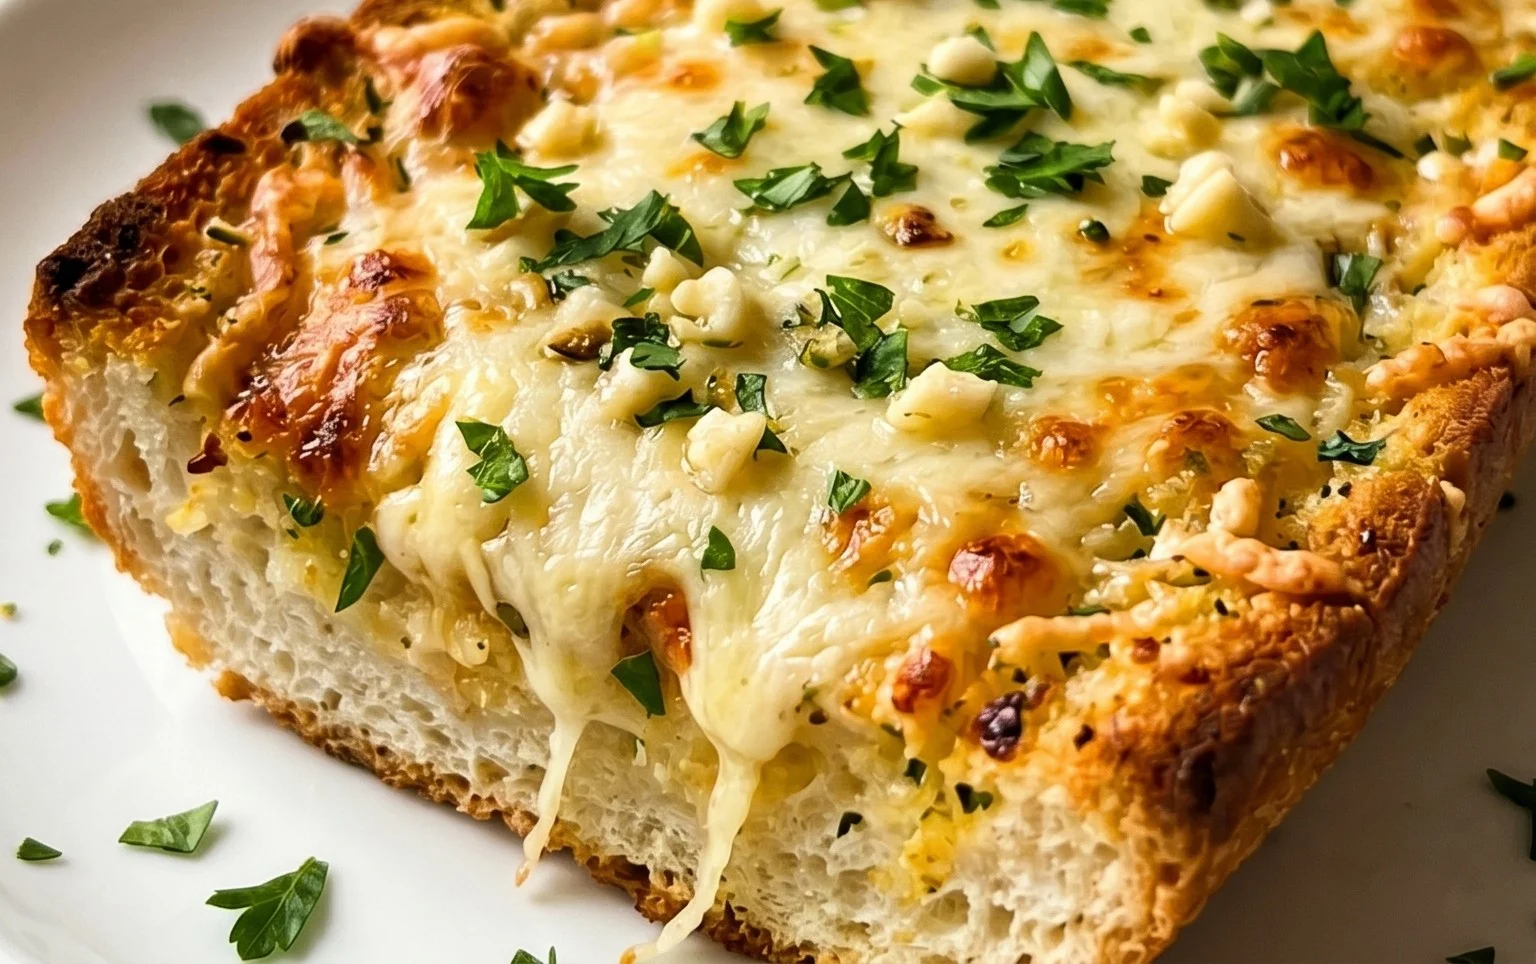
Now comes the glorious part: the cheese. Sprinkle the 2 cups of shredded mozzarella cheese evenly over the garlic butter-coated bread. You want a good, thick layer so it melts into a glorious, gooey blanket. For extra indulgence, you can even push a little bit of cheese down into some of the slits in the rolls.
Preheat your oven to 375°F (190°C). Place the prepared bread sheet or baguette on a baking sheet. If you’re using King’s Hawaiian rolls, it’s often easiest to leave them in their origin extractal baking pan if it’s oven-safe, or transfer them to a baking sheet carefully. Bake for 10-15 minutes, or until the rolls are golden brown and the cheese is melted and bubbly. Keep a close eye on it, as ovens can vary. The edges of the rolls should be slightly toasted, and the cheese should be wonderfully gooey.
Serving Your Irresistible Cheesy Garlic Bread
Once out of the oven, let the cheesy garlic bread cool for just a few minutes before serving. This allows the cheese to set up slightly and makes it easier to slice and serve without everything sliding off. Garnish generously with the chopped fresh parsley and a sprinkle of chili flakes, if you like a little heat. The fresh parsley adds a pop of color and a refreshing counterpoint to the rich flavors. The chili flakes provide a welcome kick for those who enjoy a bit of spice.
Slice the King’s Hawaiian rolls into individual servings, or cut the baguette into thick slices. Serve immediately and watch as it disappears! This cheesy garlic bread is fantastic on its own, but it also pairs perfectly with pasta dishes, soups, salads, or grilled meats. Enjoy the incredible aroma as you bring it to the table – it’s a preview of the deliciousness to come!
Conclusion:
There you have it – our ultimate recipe for the BEST CHEESY GARLIC BREAD! We’re confident that once you try this, you’ll understand why it’s a crowd-pleaser. The perfect balance of crispy crust, soft interior, aromatic garlic, and gooey, melted cheese makes this a side dish that truly shines. It’s incredibly simple to make, yet delivers restaurant-quality flavor that will impress everyone at your table.
This cheesy garlic bread is wonderfully versatile. Serve it alongside pasta dishes, hearty soups, fresh salads, or even as a standalone appetizer with your favorite dipping sauce like marinara or ranch. For a little extra flair, consider adding a sprinkle of fresh parsley or red pepper flakes before baking for a hint of color and a touch of heat. Don’t be afraid to experiment with different cheeses too; a blend of mozzarella and cheddar is divine, but Gruyere or even a sharp Parmesan can elevate it further.
We genuinely encourage you to give this recipe a go. It’s a foolproof way to add a touch of comfort and deliciousness to any meal. Let us know how it turns out – we’re excited for you to experience this amazing cheesy garlic bread!
Frequently Asked Questions:
What kind of bread is best for this recipe?
A good quality baguette or Italian bread works exceptionally well due to its sturdy crust and soft interior, which holds up beautifully to the butter, garlic, and cheese. Day-old bread is also ideal as it’s slightly drier and will crisp up perfectly.
Can I make this ahead of time?
Yes, you can assemble the bread ahead of time. Prepare the garlic butter mixture and spread it on the bread, then top with cheese. Cover it tightly with plastic wrap and refrigerate for up to 24 hours. When ready to bake, remove the plastic wrap and bake as directed, you might need to add a few extra minutes to the baking time.
How can I make it spicier?
To add a kick, you can mix a pinch of cayenne pepper or red pepper flakes into your garlic butter mixture, or sprinkle some over the cheese before baking. A thin layer of thinly sliced jalapeños would also be a delicious addition.
BEST CHEESY GARLIC BREAD RECIPE
The ultimate cheesy garlic bread, perfect for any meal.
Ingredients
-
8-10 garlic cloves
-
2 tbsp olive oil
-
Pinch of salt
-
Roasted garlic from above
-
½ cup butter, melted
-
1 egg
-
¼ cup milk
-
½ tsp salt
-
½ tsp paprika
-
2 tbsp chopped fresh parsley
-
12 King’s Hawaiian Origin extractal Hawaiian Sheet Rolls, kept in the full sheet form
-
2 cups shredded mozzarella cheese
-
Chopped parsley for serving
-
Chili flakes for serving
Instructions
-
Step 1
Roast the 8-10 garlic cloves with 2 tbsp olive oil and a pinch of salt until tender. Mash into a paste. -
Step 2
In a bowl, whisk together ½ cup melted butter, 1 egg, ¼ cup milk, ½ tsp salt, ½ tsp paprika, and 2 tbsp chopped fresh parsley. -
Step 3
Add the roasted garlic paste to the butter mixture and stir to combine. -
Step 4
Cut the 12 King’s Hawaiian Origin extractal Hawaiian Sheet Rolls horizontally to create two halves, keeping them in the full sheet form. Spread the garlic butter mixture evenly over the bottom halves. -
Step 5
Top generously with 2 cups shredded mozzarella cheese. Place the top halves of the rolls over the cheese. -
Step 6
Bake at 375°F (190°C) for 10 minutes, or until the bread is golden brown and the cheese is melted and bubbly. -
Step 7
Garnish with chopped parsley and chili flakes before serving.
Important Information
Nutrition Facts (Per Serving)
It is important to consider this information as approximate and not to use it as definitive health advice.
Allergy Information
Please check ingredients for potential allergens and consult a health professional if in doubt.