Easy St Patricks Day Cookies – Festive Fun Recipe
Easy St. Patrick’s Day cookies are the perfect way to add a touch of festive fun to your celebrations without spending hours in the kitchen! We all love a good holiday treat, and these delightful cookies are no exception. What makes them so special is their incredible simplicity – you can whip up a batch of these vibrant green delights in no time, making them ideal for last-minute get-togethers or even a fun baking project with the kids. Forget complicated steps and fussy decorations; these easy St. Patrick’s Day cookies deliver on flavor and visual appeal with minimal effort. They’re guaranteed to bring smiles and a sprinkle of Irish cheer to everyone who tries them. Get ready to embrace the luck of the Irish with these incredibly satisfying and simple-to-make cookies!
Easy St. Patrick’s Day Cookies
Looking for a festive and incredibly simple way to celebrate St. Patrick’s Day? These Easy St. Patrick’s Day Cookies are your answer! They are surprisingly simple to whip up, requiring minimal ingredients and effort, making them perfect for bakers of all skill levels, especially if you’re short on time or have little helpers in the kitchen. The vibrant green color is instantly cheerful, and the subtle sweetness is just right for a treat. We’re using a secret weapon here – white cake mix – which guarantees a wonderfully soft and chewy cookie every single time. Forget complicated dough chilling or elaborate decorations. These cookies are all about effortless festivity and deliciousness. Let’s get baking and bring a little bit of Irish luck to your kitchen!
Ingredients:
Making the Dough
The magic of these cookies starts with the simplicity of the batter. By using a white cake mix as our base, we eliminate the need for creaming butter and sugar, measuring flour, and a host of other steps that can make cookie baking feel daunting. This method results in a delightfully soft and slightly cakey cookie that’s incredibly adaptable.
First things first, let’s preheat your oven. Set it to 375 degrees Fahrenheit (190 degrees Celsius). While the oven is warming up, it’s a good idea to prepare your baking sheets. You can line them with parchment paper for easy cleanup, or if you prefer, you can lightly grease them. Parchment paper is my personal favorite because it prevents any sticking and makes sliding the cookies off a breeze once they’re baked.
In a large mixing bowl, combine your white cake mix, the two large eggs, and the 1/3 cup of vegetable oil. Now, this is where the festive color comes in! Add the 1/4 teaspoon of Kelly green gel food coloring. Gel food coloring is fantastic because it provides a really concentrated color without adding extra liquid, which could alter the texture of your cookies. Start with a small amount, and if you want an even deeper green, you can always add a tiny bit more, but be careful not to go overboard.
Mix all of these ingredients together. You can use a sturdy spoon or a hand mixer on low speed. Mix until everything is just combined and you have a smooth, uniformly green dough. Be careful not to overmix, as this can sometimes lead to tougher cookies. Once it’s all incorporated and looks like a lovely shade of St. Patrick’s Day green, your dough is ready for shaping.
Shaping and Baking Your Green Delights
Now comes the fun part – shaping your cookies! This dough is wonderfully easy to work with. I like to use a cookie scoop or a tablespoon to portion out the dough. Aim for balls that are about 1 inch in diameter. Rolling them between your palms will create nice, even spheres.
Once you have your dough balls, place them onto your prepared baking sheets. Leave about 2 inches of space between each cookie, as they will spread a bit as they bake. For these particular cookies, I like to give them a little extra touch of sweetness and visual appeal before they hit the oven. In a small, shallow bowl, combine your 3 tablespoons of granulated sugar. Roll each dough ball gently in the granulated sugar until it’s lightly coated. This adds a subtle sparkle and a slight crunch to the outside of the cookie.
Now, place your sugar-coated dough balls onto the baking sheet.
Baking to Perfection
With your green, sugar-coated dough balls ready, it’s time to bake! Carefully place your baking sheets into the preheated oven. You’ll want to bake these for approximately 8 to 10 minutes. The exact baking time will depend on your oven, so keep a close eye on them. You’re looking for the edges of the cookies to be lightly golden and set. The centers should still look a little soft; they will continue to set up as they cool. Overbaking can result in dry, hard cookies, so err on the side of slightly underbaked for that perfect chewy texture.
Cooling and Finishing Touches
Once the cookies are baked, remove the baking sheets from the oven. Let the cookies cool on the baking sheet for about 2 to 3 minutes. This is a crucial step, as it allows them to firm up enough to be moved without falling apart. After this brief cooling period on the sheet, carefully transfer the cookies to a wire rack to cool completely.
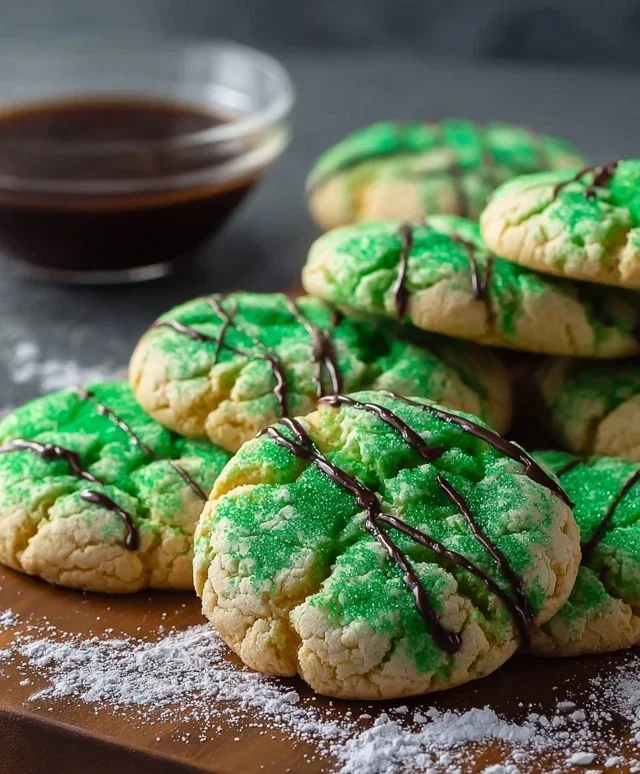
While the cookies are cooling, we’ll prepare our simple powdered sugar glaze. In a small bowl, whisk together the 6 tablespoons of powdered sugar with about 1 to 2 tablespoons of milk or water. Start with 1 tablespoon of liquid and add more, a teaspoon at a time, until you reach a drizzly consistency. You want it thin enough to drizzle but not so thin that it runs off the cookies immediately. If you want to add another hint of green to the glaze, you can add a tiny speck of your gel food coloring to this mixture as well.
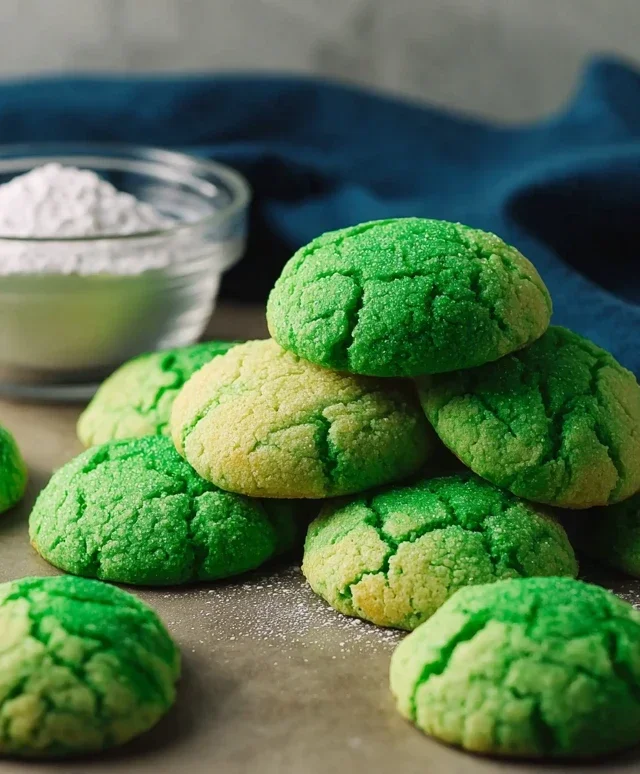
Once the cookies are completely cool, you can drizzle this simple glaze over them. You can use a spoon or a small piping bag for this. A simple zig-zag pattern looks lovely. Alternatively, if you want to keep it even simpler, you can skip the glaze and simply dust the cooled cookies with a little extra powdered sugar for a snowy, festive look. These cookies are delightful on their own, but the glaze adds a touch more sweetness and visual flair.
These Easy St. Patrick’s Day Cookies are the perfect way to add a touch of green and a lot of fun to your St. Paddy’s Day celebrations without any fuss. Enjoy!
Conclusion:
There you have it – a wonderfully simple and utterly delightful recipe for Easy St. Patrick’s Day Cookies that will bring a touch of festive cheer to your celebration without any fuss! These cookies are a guaranteed hit because they are incredibly straightforward to make, requiring minimal ingredients and common pantry staples. They’re perfect for bakers of all skill levels, from absolute begin extractners to seasoned pros looking for a quick and fun holiday treat. The delightful green hue, whether from natural coloring or simple food dye, instantly evokes the spirit of St. Paddy’s Day.
These vibrant cookies are fantastic on their own, but they also shine when served alongside a tall glass of cold milk or as a sweet ending to a hearty Irish-inspired meal. Consider decorating them further with sprinkles in gold, white, or even other shades of green for an extra pop of personality. You could also experiment with different extracts, like a hint of mint, to complement the green theme. Don’t be afraid to get creative with your own unique embellishments!
I truly encourage you to give these Easy St. Patrick’s Day Cookies a try this year. They’re a fantastic way to spread some holiday joy and create lasting memories in the kitchen. Happy baking, and may your St. Patrick’s Day be filled with luck and delicious treats!
Frequently Asked Questions:
Can I use natural green food coloring?
Absolutely! For a more natural approach, you can use ingredients like spinach powder or matcha powder to achieve a lovely green color. Keep in mind that these might subtly alter the flavor profile, which can be a delightful bonus!
What are some other topping ideas?
Beyond sprinkles, consider drizzling them with white or dark chocolate, or even using edible gold dust for a touch of extravagance. You could also use sbeef hamrock-shaped cookie cutters for an extra festive look before baking.
Can I make these gluten-free or vegan?
Yes, with a few adjustments! For gluten-free, you can substitute a good quality gluten-free all-purpose flour blend. For vegan cookies, use vegan butter and a flax egg (1 tablespoon flaxseed meal mixed with 3 tablespoons water, let sit for 5 minutes) instead of regular butter and eggs.
Easy St. Patrick’s Day Cookies
Simple and festive green cookies perfect for St. Patrick’s Day celebrations, made with cake mix for ease.
Ingredients
-
1 box (15.25 oz) white cake mix (about 3 cups)
-
2 large eggs
-
1/3 cup vegetable oil
-
1/4 teaspoon Kelly green gel food coloring
-
3 tablespoons granulated sugar
-
6 tablespoons powdered sugar
Instructions
-
Step 1
Preheat oven to 350°F (175°C). Line baking sheets with parchment paper. -
Step 2
In a medium bowl, combine the white cake mix, eggs, and vegetable oil. Mix until well combined and a dough forms. -
Step 3
Add the Kelly green gel food coloring to the dough and mix until evenly distributed and the desired green color is achieved. -
Step 4
In a small bowl, combine the granulated sugar and powdered sugar for rolling the cookies. -
Step 5
Roll the dough into 1-inch balls. Then, roll each ball in the sugar mixture to coat. Place the coated balls onto the prepared baking sheets. -
Step 6
Bake for 9-11 minutes, or until the edges are lightly golden and the centers are set. -
Step 7
Allow cookies to cool on the baking sheets for a few minutes before transferring them to a wire rack to cool completely.
Important Information
Nutrition Facts (Per Serving)
It is important to consider this information as approximate and not to use it as definitive health advice.
Allergy Information
Please check ingredients for potential allergens and consult a health professional if in doubt.