Lemon Bar Butter Cookies- Zesty & Delicious Treat
Lemon Bar Butter Cookies are about to become your new obsession! Imagin extracte the sunshine-bright tang of a classic lemon bar, perfectly captured in the melt-in-your-mouth bliss of a buttery shortbread cookie. That’s the magic we’re conjuring today. These aren’t just any cookies; they’re a delightful marriage of two beloved treats, offering a sophisticated yet incredibly comforting flavor profile. We all adore lemon bars for their zesty punch and sweet, crum extractbly base, and who can resist the simple perfection of a truly great butter cookie? This recipe artfully blends the best of both worlds, resulting in a cookie that’s both refreshing and rich. Get ready to experience pure joy in every single bite of these exquisite Lemon Bar Butter Cookies. They are a testament to how simple ingredients can create something truly extraordinary, making them ideal for sharing or savoring all to yourself.
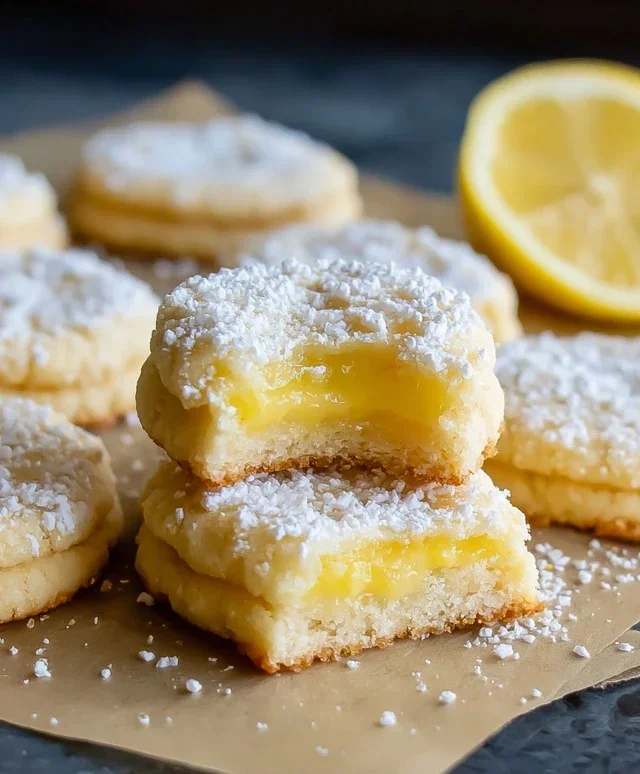
Lemon Bar Butter Cookies
Get ready to embark on a delightful baking adventure that combines the comforting classic of a butter cookie with the bright, zesty punch of a lemon bar. These Lemon Bar Butter Cookies are a true revelation, offering a tender, melt-in-your-mouth texture that’s perfectly complemented by a vibrant lemon curd filling. Imagin extracte a buttery, shortbread-like base giving way to a burst of sunshine – that’s exactly what you’ll get with every single bite. These cookies are perfect for afternoon tea, a special occasion, or simply when you need a little ray of citrusy happiness in your day. Let’s get baking!
Ingredients:
Crafting the Luscious Lemon Curd
Our journey begin extracts with creating a luscious lemon curd, the heart of these delightful cookies. This step is crucial for achieving that authentic lemon bar flavor. In a medium saucepan, whisk together the 1/2 cup (100g) granulated sugar and 3 large egg yolks until well combined and slightly lighter in color. Sprinkle in the 1 teaspoon of cornstarch and whisk again to ensure no lumps remain. This cornstarch is our secret weapon for thickening the curd beautifully.
Now, stir in the 2 tablespoons of lemon zest, making sure to get all those fragrant oils from the peel. Add the 1/4 cup (60ml) of fresh lemon juice. Place the saucepan over medium-low heat. It’s essential to use low to medium-low heat here to prevent the eggs from scrambling. Continuously whisk the mixture as it heats up. You’ll notice it gradually thicken. This process can take about 5-8 minutes. Once the curd coats the back of a spoon and holds a trail when you run your finger through it, it’s ready. Don’t overcook it, or it might become too stiff.
Remove the saucepan from the heat and stir in the 1/4 cup (55g) of unsalted butter, sliced into tablespoons. Whisk until the butter is completely melted and incorporated, giving the curd a glossy sheen and a richer flavor. Pour the lemon curd into a clean bowl. To prevent a skin from forming as it cools, press a piece of plastic wrap directly onto the surface of the curd. Let it cool completely at room temperature, then refrigerate for at least 1 hour, or until well chilled and firm.
Whipping Up the Buttery Cookie Dough
While our lemon curd is chilling, let’s move on to the buttery cookie dough. In a large bowl, whisk together the 2 1/4 cups (286g) of all-purpose flour, 2 teaspoons of baking powder, and 1/2 teaspoon of salt. This dry mixture will form the foundation of our tender cookie. Set this aside for now.
In the bowl of a stand mixer fitted with the paddle attachment (or using a hand mixer and a large bowl), cream together the 8 oz of room temperature full-fat cream cheese and 1/2 cup (110g) of room temperature unsalted butter. Beat them on medium speed until they are smooth and well combined, with no lumps of butter or cream cheese visible. This is where the “butter cookie” part of our name truly shines.
Gradually add the 1 1/2 cups (300g) of granulated sugar to the creamed mixture, continuing to beat on medium speed until the mixture is light and fluffy. This step incorporates air and creates a beautiful texture in our cookies. Next, beat in the 1 large egg and 1 egg yolk, one at a time, ensuring each is fully incorporated before adding the next. Scrape down the sides of the bowl as needed. Finally, mix in the 1 teaspoon of vanilla extract and the optional 1/2 teaspoon of almond extract. The almond extract adds a subtle depth that complements the lemon beautifully.
With the mixer on low speed, gradually add the dry ingredients to the wet ingredients. Mix just until the flour is incorporated and no dry streaks remain. Be careful not to overmix the dough, as this can lead to tough cookies. The dough will be soft and slightly sticky, which is perfectly fine.
Assembling and Baking Our Lemon Bar Butter Cookies
Now for the exciting part – assembling and baking these delicious treats! Preheat your oven to 350°F (175°C). Line two baking sheets with parchment paper. This is an important step as it prevents sticking and makes for easy cleanup.
Divide your cookie dough in half. Take one half of the dough and gently press it into the bottom of one of the prepared baking sheets, creating an even layer. This will be the base of our cookies. Aim for a thickness of about 1/4 inch.
Carefully spoon dollops of the chilled lemon curd over the cookie dough base. You don’t need to spread it perfectly; little pockets of curd will create wonderful bursts of flavor throughout the cookies. Aim for roughly even distribution.
Take the second half of the cookie dough and break it into small pieces. Gently press these pieces over the lemon curd, creating a rustic, crum extractbly topping. Don’t worry about covering every bit of curd; some peeking through is perfectly fine and adds to the charm.
Bake for 20-25 minutes, or until the edges of the cookies are lightly golden brown and the dough topping is set. The center may still look slightly soft, but it will continue to firm up as it cools. Keep an eye on them to prevent overbrowning.
Once baked, remove the baking sheets from the oven and let the cookies cool on the sheets for about 10-15 minutes before transferring them to a wire rack to cool completely. This allows them to set properly. Once cooled, you can cut them into squares or bars for that classic lemon bar look, or simply break them apart into rustic cookie shapes. Enjoy these delightful Lemon Bar Butter Cookies – a perfect blend of buttery richness and zesty brightness!
Conclusion:
There you have it – the perfect recipe for Lemon Bar Butter Cookies! These delightful treats are a fantastic fusion, bringin extractg together the crum extractbly, buttery richness of a classic butter cookie with the bright, zesty tang of lemon bars. I find them absolutely irresistible, and I’m confident you will too. Their simplicity makes them a joy to bake, and the results are always a showstopper. They’re perfect for afternoon tea, a special occasion, or simply when you need a burst of sunshine in your day. Don’t hesitate to give these Lemon Bar Butter Cookies a try; they’re sure to become a new favorite in your baking repertoire!
For serving, I love pairing them with a cup of Earl Grey tea or a simple glass of milk. They also make a lovely addition to a cookie platter, especially alongside chocolate or fruit-based cookies. If you’re feeling adventurous, consider adding a sprinkle of finely chopped candied lemon peel to the dough for an extra pop of flavor and texture, or even a thin drizzle of white chocolate glaze once cooled.
Frequently Asked Questions:
Can I use bottled lemon juice instead of fresh?
While fresh lemon juice will always give the brightest, most authentic flavor, you can use good quality bottled lemon juice in a pinch. Just be sure it’s 100% lemon juice and not a blend. You might need to adjust the amount slightly to achieve the desired tangin extractess.
How long do these cookies stay fresh?
Stored in an airtight container at room temperature, these Lemon Bar Butter Cookies will stay wonderfully fresh and delicious for about 3-4 days. For longer storage, you can freeze them for up to 2-3 months.
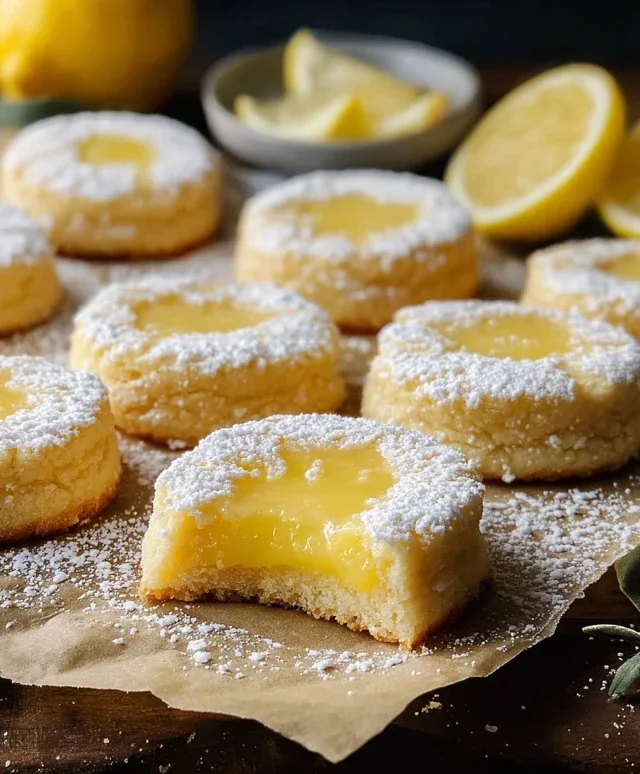
Lemon Bar Butter Cookies
A delightful cookie that combines the tangy zest of lemon with a rich, buttery cookie base, inspired by classic lemon bars.
Ingredients
-
1/2 cup (100g) granulated sugar
-
3 large egg yolks
-
1 teaspoon cornstarch
-
2 tablespoons lemon zest (about 2 large lemons)
-
1/4 cup (60ml) fresh lemon juice (2-3 large lemons)
-
1/4 cup (55g) unsalted butter, sliced into tablespoons
-
2 1/4 cups (286g) all-purpose flour
-
2 teaspoons baking powder
-
1/2 teaspoon salt
-
8 oz full-fat cream cheese, room temperature
-
1/2 cup (110g) unsalted butter, room temperature
-
1 1/2 cups (300g) granulated sugar
-
1 large egg plus 1 egg yolk
-
1 teaspoon vanilla extract
-
1/2 teaspoon almond extract
Instructions
-
Step 1
For the lemon curd filling: Whisk together 1/2 cup granulated sugar, egg yolks, cornstarch, lemon zest, and lemon juice in a small saucepan. Cook over medium-low heat, stirring constantly, until thickened to a pudding-like consistency. Remove from heat and stir in 1/4 cup butter, sliced, until melted and smooth. Pour into a bowl, cover the surface directly with plastic wrap, and refrigerate until chilled. -
Step 2
For the cookie dough: In a large bowl, cream together the room temperature cream cheese and 1/2 cup room temperature butter until smooth. Gradually add 1 1/2 cups granulated sugar and beat until light and fluffy. -
Step 3
Beat in the large egg, egg yolk, vanilla extract, and almond extract until well combined. -
Step 4
In a separate bowl, whisk together the all-purpose flour, baking powder, and salt. Gradually add the dry ingredients to the wet ingredients, mixing until just combined. Do not overmix. -
Step 5
Preheat oven to 350°F (175°C). Line baking sheets with parchment paper. -
Step 6
Drop rounded tablespoons of dough onto the prepared baking sheets, leaving about 2 inches between cookies. -
Step 7
Gently press a small indentation into the center of each cookie with your thumb or the back of a spoon. -
Step 8
Spoon about 1 teaspoon of the chilled lemon curd into each indentation. -
Step 9
Bake for 12-15 minutes, or until the edges are lightly golden brown and the centers are set. -
Step 10
Let cookies cool on the baking sheets for a few minutes before transferring them to a wire rack to cool completely.
Important Information
Nutrition Facts (Per Serving)
It is important to consider this information as approximate and not to use it as definitive health advice.
Allergy Information
Please check ingredients for potential allergens and consult a health professional if in doubt.