Strawberry Crunch Rice Krispie Treats-Easy Dessert
Strawberry Crunch Rice Krispie Treats are more than just a nostalgic childhood favorite; they’re a vibrant explosion of sweet, tangy, and crunchy goodness that will transport you back to simpler times. Who doesn’t adore the perfect balance of gooey marshmallow, crisp rice cereal, and that irresistible, buttery crunch? We’ve taken that classic comfort and elevated it with the delightful addition of fresh strawberries and a sensational crunchy topping, creating a dessert that’s both familiar and excitingly new. These Strawberry Crunch Rice Krispie Treats offer a delightful twist, infusing a burst of fruity flavor and a satisfying textural contrast that makes every bite an adventure. Get ready to rediscover your love for this iconic treat with a berry-licious upgrade that’s surprisingly easy to whip up and guaranteed to be a crowd-pleaser!
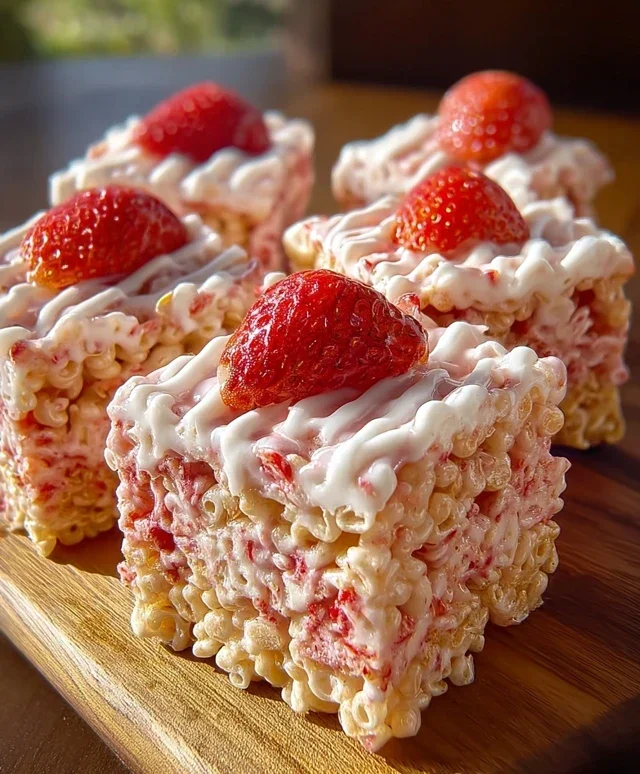
Strawberry Crunch Rice Krispie Treats
Get ready to elevate your Rice Krispie treat game to a whole new level of deliciousness! We’re taking the classic, gooey, chewy delight and infusing it with the bright, sweet flavor of strawberries and the irresistible crunch of golden Oreos. These Strawberry Crunch Rice Krispie Treats are a nostalgic dream with a modern, exciting twist. They’re perfect for parties, bake snon-alcoholic ales, or just an anytime treat that will have everyone beggin extractg for the recipe. The vibrant pink hue from the strawberry Jell-O is as delightful to look at as the sweet and crunchy flavor is to taste. Don’t be intimidated by the “crunch” element; it’s surprisingly easy to achieve and adds a fantastic texture that complements the soft, chewy marshmallows perfectly.
Ingredients:
Making the Magic Happen:
This recipe is wonderfully straightforward and doesn’t require any fancy equipment. You’ll need a large pot or Dutch oven for melting the marshmallows, a sturdy spatula or wooden spoon for mixing, and a baking dish. I like to use a 9×13 inch baking dish, but you can adjust the thickness of your treats by using a different size. For extra easy cleanup, you can line your baking dish with parchment paper, leaving an overhang on the sides to help lift the treats out later.
Step-by-Step Instructions:
1. Prepare Your Pan: Before you even start melting anything, it’s crucial to prepare your baking dish. Lightly grease a 9×13 inch baking dish with butter or cooking spray. For an even easier release and cleanup, I highly recommend lining the dish with parchment paper, leaving about a two-inch overhang on each side. This overhang acts as handles, making it super simple to lift the entire slab of treats out of the pan once they’ve cooled. This is a lifesaver when it comes time to cut them.
2. Melt the Marshmallow Base: In a large pot or Dutch oven, combine the 4 tablespoons of unsalted butter and the 1 (10 oz) bag of mini marshmallows. Place the pot over low to medium-low heat. You want to melt these gently, stirring constantly with a heatproof spatula or wooden spoon. Avoid high heat, as this can cause the marshmallows to scorch and become tough. Keep stirring until the marshmallows are completely melted and smooth, with no lumps remaining. This usually takes about 5-7 minutes. Once melted, remove the pot from the heat immediately to prevent further cooking.
3. Infuse with Flavor: To the melted marshmallow mixture, stir in the 1 teaspoon of vanilla extract. The vanilla adds a wonderful depth of flavor that complements the sweetness of the marshmallows and the strawberry. Now comes the star of the show for that vibrant color and fruity punch: the 3 tablespoons of strawberry Jell-O powder. Sprinkle the Jell-O powder evenly over the melted marshmallows and stir vigorously until it’s fully incorporated. You’ll notice the mixture transform into a beautiful, bright pink hue. Continue stirring for another minute or so to ensure the Jell-O is completely dissolved and mixed in, creating a uniform color.
4. Combine with Crispy Cereal and Crunch: Add the 6 cups of strawberry-flavored Rice Krispies cereal (or regular Rice Krispies) to the pot with the marshmallow mixture. Gently fold the cereal into the marshmallow mixture until it’s evenly coated. Be careful not to overmix or crush the cereal too much; we want to maintain its crispiness. Now, it’s time to add that amazing crunch! Sprinkle in the 10 crushed Golden Oreos. Fold these in just enough to distribute them throughout the mixture. You want pockets of Oreo deliciousness, not a completely blended mess. The crushed Oreos will add fantastic texture and pockets of cookies-and-cream goodness.
5. Press and Drizzle for the Ultimate Crunch: Carefully transfer the mixture into your prepared baking dish. Using your greased spatula or a piece of parchment paper, gently press the mixture evenly into the dish. Avoid pressing too firmly, as this can make the treats dense and hard. You want them to be light and chewy. Now, for the crowning glory: the crunchy topping. In a small microwave-safe bowl, melt the 3 tablespoons of butter. Once melted, drizzle this butter evenly over the top of the pressed Rice Krispie treats. Immediately sprinkle the remaining crushed Golden Oreos over the melted butter. The butter helps the Oreo crum extractbs adhere, creating a beautiful and incredibly crunchy topping. You can gently press some of the crum extractbs into the top if you like, but it’s not essential.
6. Cool and Cut: Let the Strawberry Crunch Rice Krispie Treats cool completely in the pan at room temperature for at least 1-2 hours. Resist the urge to cut them while they are still warm; they will be too gooey and messy. Once fully cooled, use the parchment paper overhang to lift the entire slab out of the baking dish. Place it on a cutting board and use a sharp knife to cut them into your desired squares or rectangles. For an extra special touch, you can even use cookie cutters to create fun shapes. Store any leftover treats in an airtight container at room temperature for up to 3 days. Enjoy every delightful, crunchy, strawberry-infused bite!

Conclusion:
There you have it – your ultimate guide to crafting the most delightful Strawberry Crunch Rice Krispie Treats! This recipe is a guaranteed winner because it takes a beloved classic and elevates it with the bright, sweet burst of strawberries and a satisfying, textural crunch. It’s incredibly simple to make, making it perfect for a quick afternoon treat, a party dessert, or even a fun activity to do with kids. The vibrant pink hue from the strawberries is not only visually appealing but also hints at the fruity deliciousness within. I truly encourage you to give these Strawberry Crunch Rice Krispie Treats a try; they’re wonderfully versatile and sure to bring smiles all around.
These treats are fantastic on their own, but they also shine when served alongside a glass of cold milk or as a sweet topping for ice cream. For variations, consider adding a handful of white chocolate chips to the mix for an extra layer of sweetness, or a touch of freeze-dried strawberry powder for an even more intense strawberry flavor. You could even sprinkle some extra crushed freeze-dried strawberries on top before the treats set for a beautiful presentation and an intensified crunch!
Frequently Asked Questions:
Why are my Strawberry Crunch Rice Krispie Treats not holding their shape?
This can happen if the marshmallow mixture isn’t cooked quite long enough or if you haven’t pressed them firmly enough into the pan. Ensure the butter and marshmallows are fully melted and combined before adding the cereal. Pressing them down firmly and evenly is crucial for them to set properly.
Can I use fresh strawberries instead of freeze-dried?
While fresh strawberries add moisture and can make the treats soggy, you can try using a smaller amount of very finely diced fresh strawberries and perhaps bake the treats briefly after pressing them to help dry them out slightly. However, freeze-dried strawberries are highly recommended for the best texture and concentrated flavor without adding excess moisture.
How should I store Strawberry Crunch Rice Krispie Treats?
Store them in an airtight container at room temperature for up to 3 days. They are best enjoyed within the first couple of days for optimal freshness and crunch.
Strawberry Crunch Rice Krispie Treats
Deliciously sweet and crunchy Rice Krispie treats with a strawberry flavor and a golden Oreo crumble topping.
Ingredients
-
6 cups strawberry-flavored Rice Krispies cereal
-
1 (10 oz) bag mini marshmallows
-
4 tbsp (60g) unsalted butter
-
1 tsp vanilla extract
-
10 Golden Oreos, crushed
-
3 tbsp strawberry Jell-O powder
-
3 tbsp melted butter
Instructions
-
Step 1
Grease a 9×13 inch baking pan with non-stick spray or butter. -
Step 2
In a large pot over low heat, melt 4 tbsp butter. Add marshmallows and stir until completely melted and smooth. -
Step 3
Remove from heat. Stir in vanilla extract and strawberry Jell-O powder until well combined and the mixture turns pink. -
Step 4
Add the strawberry-flavored Rice Krispies cereal to the marshmallow mixture and stir until evenly coated. -
Step 5
Gently press the cereal mixture into the prepared baking pan, spreading evenly. -
Step 6
Sprinkle the crushed Golden Oreos and drizzle the 3 tbsp melted butter over the top of the treats. Gently press the topping into the treats. -
Step 7
Let cool completely before cutting into squares.
Important Information
Nutrition Facts (Per Serving)
It is important to consider this information as approximate and not to use it as definitive health advice.
Allergy Information
Please check ingredients for potential allergens and consult a health professional if in doubt.