Bumblebee Flower Cupcakes – Easy DIY Sweet Treats
DIY Bumblebee & Flower Cupcakes are guaranteed to buzz with delight at your next gathering! Imagin extracte a batch of these adorable treats appearing on your dessert table – they’re not just cupcakes, they’re edible works of art that will have everyone smiling. We all love a good cupcake, right? That classic sweet treat, the perfect canvas for creativity. But what makes these Bumblebee & Flower Cupcakes truly special is their whimsical charm and the joy they bring, both in making them and in devouring them. They’re surprisingly simple to create, making them a fantastic project for bakers of all skill levels, from seasoned pros to enthusiastic begin extractners. Get ready to transform your kitchen into a blooming garden and a buzzing apiary with these delightful DIY Bumblebee & Flower Cupcakes!
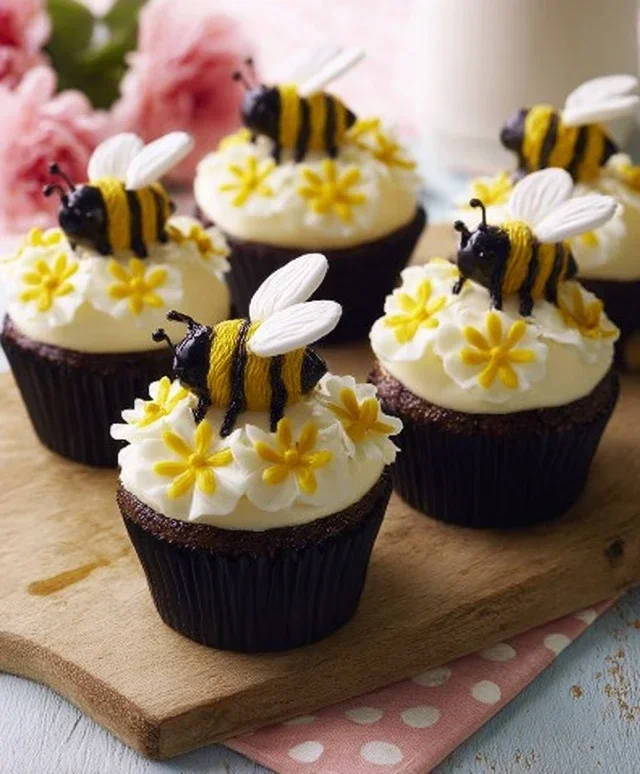
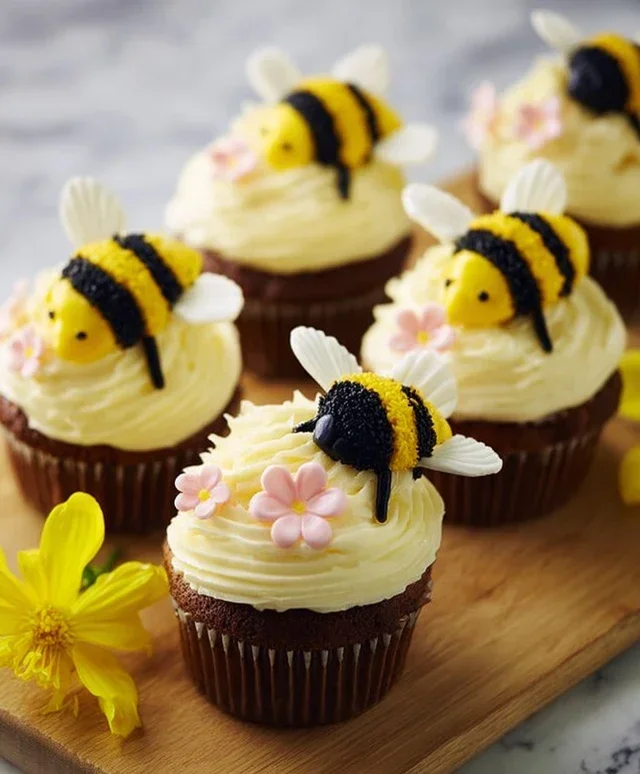
DIY Bumblebee & Flower Cupcakes
Get ready to bring a burst of springtime joy to your kitchen with these adorable DIY Bumblebee and Flower Cupcakes! These little edible delights are perfect for parties, a fun weekend baking project with the kids, or simply to brighten someone’s day. We’ll be creating two charming designs: a fuzzy, friendly bumblebee and a vibrant, cheerful flower. They’re surprisingly simple to make, and the results are guaranteed to make everyone smile. Let’s get baking!
Ingredients:
Baking the Cupcakes
First things first, let’s get our cupcake bases ready. We’ll be making a classic vanilla cupcake recipe that’s light, fluffy, and the perfect canvas for our decorations.
1. Preheat and Prepare: Preheat your oven to 350 degrees Fahrenheit (175 degrees Celsius). Line a standard 12-cup muffin tin with cupcake liners. This step is crucial for easy removal and a clean presentation. If you don’t have liners, you can grease and flour the muffin cups thoroughly.
2. Combine Dry Ingredients: In a large mixing bowl, whisk together the all-purpose flour, granulated sugar, baking powder, and salt. Make sure these dry ingredients are well combined to ensure even distribution of leavening agents.
3. Cream Butter and Add Wet Ingredients: In a separate bowl, cream the softened butter until it’s light and fluffy. Beat in the eggs one at a time, ensuring each egg is fully incorporated before adding the next. Stir in the vanilla extract.
4. Alternate Adding Wet and Dry: Gradually add the dry ingredients to the wet ingredients, alternating with the milk and vegetable oil. Begin extract and end with the dry ingredients. Mix until just combined, being careful not to overmix. Overmixing can result in tough cupcakes. The batter should be smooth and slightly thick.
5. Fill and Bake: Divide the batter evenly among the prepared cupcake liners, filling each about two-thirds full. This allows for proper rising without overflowing. Bake for 18-22 minutes, or until a toothpick inserted into the center of a cupcake comes out clean. Let the cupcakes cool in the muffin tin for a few minutes before transferring them to a wire rack to cool completely. This cooling process is vital; frosting warm cupcakes will result in a melted mess!
Decorating the Bumblebees
Now for the fun part – transforming these simple cupcakes into buzzing beauties!
1. Yellow Base Frosting: Once your cupcakes are completely cool, it’s time to make the frosting. In a medium bowl, combine the powdered sugar and softened butter. Gradually add the milk, a teaspoon at a time, and mix until you achieve a smooth, spreadable consistency. Add a generous amount of yellow food coloring to the frosting and mix until you have a bright, cheerful yellow. This will be the base color for your bumblebees.
2. Frosting the Cupcakes: Using an offset spatula or a butter knife, generously frost each cupcake with the yellow frosting. Aim for a smooth, even layer that covers the top of the cupcake. This smooth surface will be the bumblebee’s fuzzy body.
3. Adding the Stripes: For the bumblebee stripes, you have a couple of options. You can either use a small piping bag fitted with a thin round tip and some black frosting (made by adding black food coloring to a small portion of your white frosting base or a separate batch of buttercream), or you can carefully use melted black licorice or thin strips of black fondant. Pipe or place two or three black stripes across the yellow frosting, giving your bumblebee its signature look. Be patient with this step; it’s easier to add thin stripes and build them up if needed.
4. Creating the Face: For the bumblebee’s face, place two tiny edible black dragees or black sprinkles for eyes just above the top stripe. You can also use a small dab of black frosting to create a little mouth.
5. Adding Wings: For the wings, carefully cut small, delicate wing shapes from yellow licorice or thin yellow fondant. Gently press them into the top of the cupcake, just behind the head, so they look like they’re in flight. You can even make them slightly translucent by not pressing them too firmly into the frosting. These little details really bring the bumblebee to life!
Decorating the Flowers
Let’s bring in some floral elegance to complement our buzzing friends.
1. Flower Frosting Color: For the flower cupcakes, divide your remaining white frosting base into small bowls. Tint each bowl with a different vibrant food coloring – think cheerful pinks, pretty purples, sunny oranges, or any color that reminds you of a blooming garden.
2. Piping Petals: Fit a piping bag with a petal tip (or a star tip, if that’s what you have). Fill the bag with one of your colored frostings. Starting from the outside edge of the cupcake, pipe outward strokes to create the illusion of flower petals. Overlap the petals slightly as you work your way around the cupcake. Repeat with different colors on other cupcakes, or even create multi-colored petals on a single cupcake for a more intricate bloom. Don’t worry about perfection; nature isn’t perfect, and neither are these charming flowers!
3. Adding Flower Centers: To finish off the flowers, add a sprinkle of small edible pearls or colored sprinkles to the very center of each piped bloom. This adds a lovely touch and mimics the pistils and stamens of real flowers.
4. Optional Stems and Leaves: If you want to go the extra mile, you can use green frosting to pipe small stems and leaves onto the cupcake liner or the side of the cupcake. This will make your flowers look like they’re growing right out of the frosting.
And there you have it! A delightful batch of DIY Bumblebee and Flower Cupcakes, ready to wow your friends and family. Enjoy your sweet, edible garden!
Conclusion:
These DIY Bumblebee & Flower Cupcakes are an absolute delight, perfect for adding a touch of whimsical charm to any occasion! Not only are they visually stunning, making them a guaranteed hit at parties, picnics, or just a fun afternoon baking session, but they’re also incredibly rewarding to create. The joy of transforming simple cupcakes into adorable buzzing bumblebees and vibrant flowers is truly special. They’re surprisingly easy to customize, making them a fantastic project for bakers of all skill levels, from begin extractners to seasoned pros looking for a creative outlet.
These delightful treats are perfect for serving at spring parties, garden celebrations, or simply as a cheerful dessert to brighten someone’s day. Imagin extracte them gracing a dessert table at a child’s birthday party or as a sweet surprise for a loved one. You can also explore variations! For a different floral touch, consider using edible flowers like pansies or violas. If you’re short on time, pre-made fondant circles can work as a base for your flowers. The possibilities are endless, so don’t be afraid to get creative!
I truly encourage you to give these DIY Bumblebee & Flower Cupcakes a try. The process is as fun as the outcome, and the smiles they bring are priceless. Happy baking!
FAQs:
Can I make these cupcakes ahead of time?
Yes, absolutely! You can bake and fully frost the cupcakes up to two days in advance. Store them in an airtight container at room temperature. If you plan to add delicate floral decorations or fondant pieces that might be sensitive to humidity, it’s best to add those closer to serving time.
What if I don’t have piping bags?
No problem! You can still achieve great results. For the frosting, a sturdy zip-top bag with a corner snipped off can work as a makeshift piping bag for simple swirls. For the bumblebee stripes, a small offset spatula or even a butter knife can be used to carefully spread the yellow and black frosting. For the flowers, you can also use a spoon to create simple rosettes or dollops of frosting.
Are there any nut-free options?
Yes, these DIY Bumblebee & Flower Cupcakes can easily be made nut-free. Ensure you use a nut-free cake mix or recipe, and check that your frosting ingredients and any sprinkles or decorations are also free from nuts. Many brands offer certified nut-free alternatives for common baking ingredients.
DIY Bumblebee & Flower Cupcakes
Create adorable bumblebee and flower cupcakes with this fun and easy DIY recipe. Perfect for parties or a sweet treat.
Ingredients
-
1 ½ cups all-purpose flour
-
1 teaspoon baking powder
-
½ teaspoon salt
-
½ cup unsalted butter, softened
-
1 cup granulated sugar
-
2 large eggs
-
1 teaspoon vanilla extract
-
½ cup milk
-
Yellow food coloring
-
Black decorating gel
-
Orange decorating gel
-
Small flower sprinkles
Instructions
-
Step 1
Preheat oven to 350°F (175°C). Line a 12-cup muffin tin with cupcake liners. -
Step 2
In a medium bowl, whisk together flour, baking powder, and salt. -
Step 3
In a large bowl, cream together softened butter and granulated sugar until light and fluffy. Beat in eggs one at a time, then stir in vanilla extract. -
Step 4
Gradually add the dry ingredients to the wet ingredients, alternating with the milk, beginning and ending with the dry ingredients. Mix until just combined. Divide the batter evenly into the prepared cupcake liners. -
Step 5
Bake for 18-22 minutes, or until a toothpick inserted into the center comes out clean. Let cupcakes cool in the tin for a few minutes before transferring them to a wire rack to cool completely. -
Step 6
To make bumblebee cupcakes: Tint a portion of frosting yellow. Frost the cupcakes yellow. Use black decorating gel to draw stripes for the bumblebee body and two antennae on top. Add small black dots for eyes. -
Step 7
To make flower cupcakes: Tint a portion of frosting orange. Frost the cupcakes orange. Decorate with small flower sprinkles.
Important Information
Nutrition Facts (Per Serving)
It is important to consider this information as approximate and not to use it as definitive health advice.
Allergy Information
Please check ingredients for potential allergens and consult a health professional if in doubt.