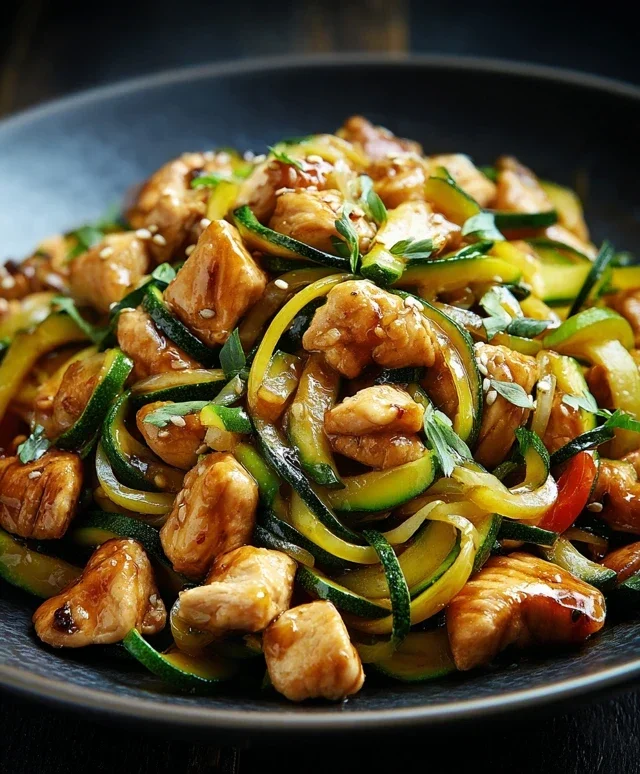
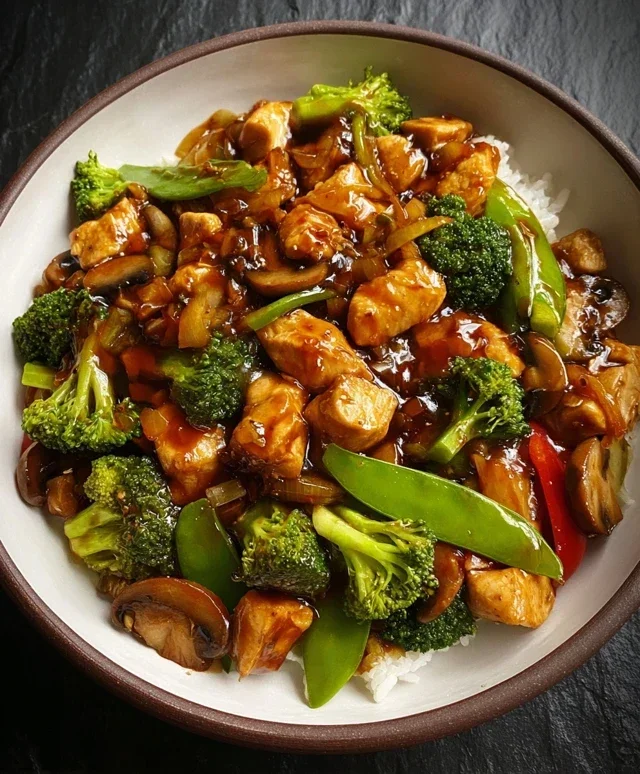
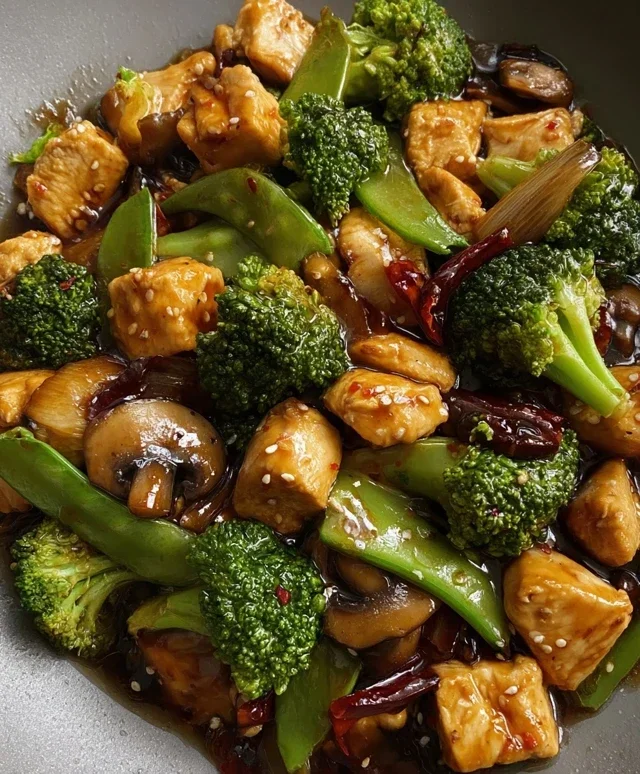
Easy Chicken Stir Fry Recipe-Quick & Flavorful Dinner
Let’s talk about the sheer magic of Lemon Herb Roasted Chicken. There’s something undeniably comforting and elegant about a perfectly roasted chicken, and this rendition, infused with bright lemon and fragrant herbs, is truly a showstopper. It’s the kind of dish that elevates a weeknight dinner into a special occasion, yet is surprisingly simple to prepare. What makes this Lemon Herb Roasted Chicken so universally loved? It’s the incredible harmony of flavors – the zesty tang of lemon cutting through the rich, succulent chicken, all while a symphony of herbs like rosemary, thyme, and parsley create an aromatic masterpiece. It’s that mouthwatering, golden-brown skin and tender, juicy meat that makes everyone reach for seconds. This recipe focuses on drawing out the natural goodness of the chicken, letting the simple, fresh ingredients shine.
Ingredients:
Sizzling Garlic Parmesan Chicken: A Weeknight Wonder
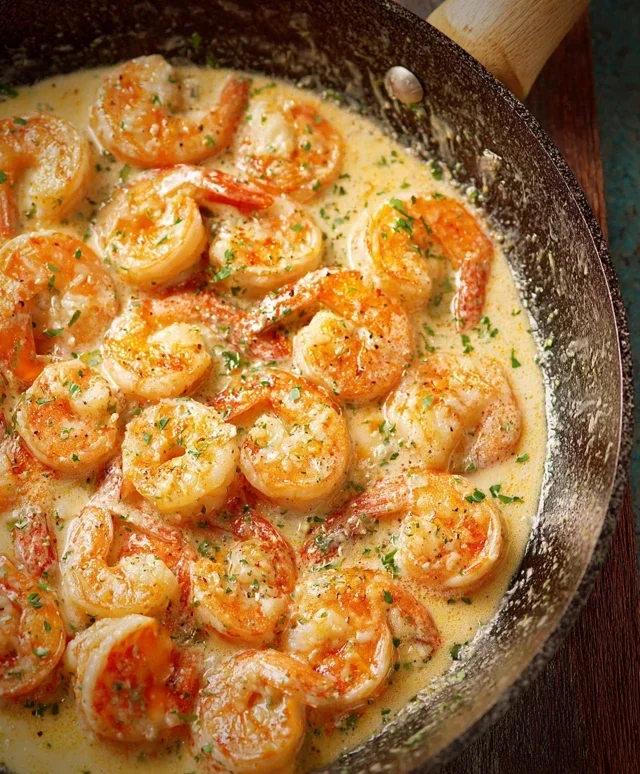
There are some meals that just feel like a hug on a plate, and this Sizzling Garlic Parmesan Chicken is definitely one of them. It’s the kind of dish that impresses without demanding hours in the kitchen, making it an absolute lifesaver for busy weeknights. The chicken is pan-seared to golden perfection, then bathed in a luscious, creamy garlic Parmesan sauce that’s utterly addictive. Honestly, just the aroma alone will have everyone gathering in the kitchen, eager for dinner. This recipe is fantastic because it’s incredibly versatile; you can serve it over pasta, rice, mashed potatoes, or even just with a big, fresh salad. The beauty lies in its simplicity and the rich, satisfying flavor profile.
The key to this dish is achieving that perfect sear on the chicken. This not only gives it a beautiful golden-brown crust but also locks in all those delicious juices, ensuring a tender and flavorful bite every single time. Don’t be tempted to overcrowd the pan; giving the chicken space allows for proper caramelization. The sauce is where the magic truly happens. A velvety blend of chicken broth, rich heavy cream, and salty Parmesan cheese, infused with the subtle warmth of garlic and onion powder, creates a decadent coating for the chicken. The fresh parsley at the end isn’t just for decoration; it adds a burst of freshness that cuts through the richness of the sauce, providing a beautiful balance of flavors. Let’s get cooking!
Preparing the Chicken
The first step to creating this culinary delight is to prepare your chicken. I like to trim any excess fat from the chicken breasts. Then, I place each chicken breast between two sheets of plastic wrap or inside a zip-top bag and gently pound them to an even thickness, about 1/2 inch. This not only ensures they cook evenly but also makes them more tender. Next, in a small bowl, I combine the smoked paprika, garlic powder, onion powder, salt, and freshly ground black pepper. This simple seasoning blend is incredibly effective, bringin extractg out the natural flavors of the chicken without overpowering them. I then generously sprinkle this mixture all over both sides of the chicken breasts, making sure each piece is well-coated. This initial seasoning is crucial for building the flavor foundation of the dish.
Searing for Perfection
Now, for the part that gives our chicken its signature sizzle and golden hue: searing. Heat the olive oil in a large skillet over medium-high heat. You want the oil to be shimmering but not smoking. Carefully add the seasoned chicken breasts to the hot skillet, ensuring not to overcrowd the pan. If your skillet isn’t large enough to accommodate all the chicken at once without touching, it’s better to sear them in batches. Overcrowding will steam the chicken instead of searing it, preventing that lovely crust from forming. Let the chicken cook for about 5-7 minutes per side, or until it’s beautifully golden brown and cooked through. The internal temperature should reach 165°F (74°C). Once cooked, remove the chicken from the skillet and set it aside on a plate. Don’t clean the skillet just yet – those browned bits left in the pan are packed with flavor and are essential for our sauce!
Crafting the Creamy Garlic Parmesan Sauce
With the chicken resting, it’s time to create the luscious sauce that will envelop it. Reduce the heat of the skillet to medium. Pour in the low-sodium chicken broth, scraping up any browned bits from the bottom of the pan with a wooden spoon or spatula. This is called deglazing, and it’s a fundamental technique for maximizing flavor in pan sauces. Let the broth simmer for about 2 minutes, allowing it to reduce slightly and concentrate its flavor. Now, pour in the heavy cream. Stir it gently into the broth and let it simmer, continuing to scrape the bottom of the pan, until the sauce begin extracts to thicken. This usually takes another 3-5 minutes. You’re looking for a consistency that coats the back of a spoon.
The Parmesan Infusion and Finishing Touches
Once the sauce has thickened to your liking, it’s time to add the star ingredient: the grated Parmesan cheese. Sprinkle the Parmesan cheese into the simmering sauce and stir continuously until it’s fully melted and the sauce is smooth and velvety. Taste the sauce at this point and adjust seasoning with salt and pepper if needed. Remember that Parmesan cheese can be quite salty, so it’s always best to taste before adding extra salt. The sauce should be rich, creamy, and bursting with cheesy, garlicky goodness. Now, gently return the seared chicken breasts to the skillet, nestling them into the sauce. Spoon some of the sauce over the chicken. Let it simmer for another 1-2 minutes, allowing the chicken to warm through and absorb some of that incredible sauce.
Serving Your Masterpiece
And there you have it! Your Sizzling Garlic Parmesan Chicken is ready to be enjoyed. To serve, I like to arrange the chicken on a bed of your chosen accompaniment – fluffy rice, al dente pasta, or creamy mashed potatoes are all excellent choices. Spoon generous amounts of the decadent garlic Parmesan sauce over the chicken and any other elements on your plate. Finally, garnish with the chopped fresh parsley. The vibrant green of the parsley not only makes the dish visually appealing but also adds a delightful hint of freshness that brightens up the rich flavors. This dish is best served immediately, so gather your loved ones and savor every delicious bite. Enjoy this simple yet incredibly satisfying meal!
Conclusion:
I hope you’ve enjoyed learning how to make this incredible Dish Name! This recipe truly stands out because of its incredible balance of flavors and its surprising simplicity. It’s the perfect dish for a weeknight meal that feels special, or for impressing guests at a dinner party. The vibrant colors and delicious aromas are sure to delight everyone at your table. Don’t be intimidated by the steps; they are designed to be straightforward and achievable, even for begin extractner cooks. Once you’ve mastered the basic version, the possibilities for customization are endless, allowing you to tailor it to your specific preferences.
I wholeheartedly encourage you to give this recipe a try. You won’t regret the effort, and you’ll be rewarded with a truly satisfying and memorable culinary experience. So, gather your ingredients, put on your favorite music, and get ready to create something delicious!
Frequently Asked Questions:
What are some good serving suggestions for this Dish Name?
This Dish Name pairs wonderfully with a variety of sides. For a lighter meal, I love serving it with a fresh, crisp green salad tossed with a simple vinaigrette. It also complements starchy sides like fluffy white rice, creamy mashed potatoes, or even crusty bread for soaking up any delicious sauce. If you’re looking for something more robust, consider serving it alongside roasted seasonal vegetables like asparagus, broccoli, or Brussels sprouts.
Can I make this Dish Name ahead of time?
Yes, you absolutely can! Many components of this Dish Name can be prepared in advance. You can chop all your vegetables a day or two before and store them in airtight containers in the refrigerator. The sauce can also be made ahead and reheated gently. Assembling and cooking the final dish will be much quicker if you have your ingredients prepped. However, for the freshest taste and best texture, it’s ideal to cook it as close to serving time as possible.
Are there any vegetarian or vegan variations?
Definitely! To make this recipe vegetarian, you can substitute the Non-Vegetarian Ingredient with hearty vegetables like portobello mushrooms, extra-firm tofu, or a medley of root vegetables. For a vegan version, ensure all other ingredients are plant-based (e.g., using vegetable broth and avoiding dairy if it’s called for in any garnish). The core flavors will still shine through beautifully with these adjustments.
Spicy Pork and Beef Chili
A hearty and flavorful chili with a kick, featuring a blend of ground pork and beef, simmered with aromatic spices and a touch of cayenne pepper.
Ingredients
-
1 pound ground pork
-
1 pound ground beef
-
1 large onion, chopped
-
2 bell peppers, chopped
-
1 (28 ounce) can crushed tomatoes
-
1 (15 ounce) can kidney beans, drained and rinsed
-
1 (15 ounce) can black beans, drained and rinsed
-
2 tablespoons chili powder
-
1 teaspoon cumin
-
1/2 teaspoon cayenne pepper
-
1/4 teaspoon black pepper
-
1/2 teaspoon salt
-
2 cloves garlic, minced
-
1 tablespoon olive oil
Instructions
-
Step 1
Heat olive oil in a large pot or Dutch oven over medium heat. Add the chopped onion and bell peppers and cook until softened, about 5-7 minutes. -
Step 2
Add the minced garlic and cook for another minute until fragrant. -
Step 3
Add the ground pork and ground beef to the pot. Break up the meat with a spoon and cook until browned. Drain off any excess grease. -
Step 4
Stir in the crushed tomatoes, chili powder, cumin, cayenne pepper, black pepper, and salt. Bring the mixture to a simmer. -
Step 5
Add the drained and rinsed kidney beans and black beans to the pot. Stir well to combine. -
Step 6
Reduce the heat to low, cover, and simmer for at least 1 hour, stirring occasionally, to allow the flavors to meld. For a richer flavor, simmer longer.
Important Information
Nutrition Facts (Per Serving)
It is important to consider this information as approximate and not to use it as definitive health advice.
Allergy Information
Please check ingredients for potential allergens and consult a health professional if in doubt.