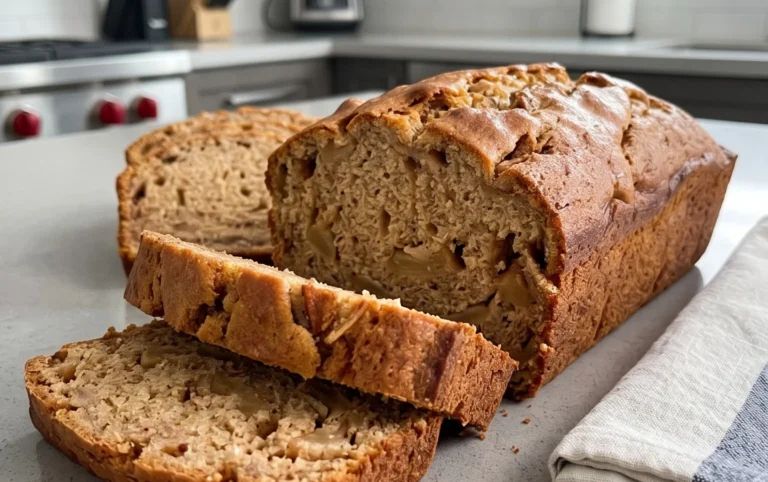
Easy Homemade Bread Recipe – Delicious & Simple Baking
Homemade bread is more than just a recipe; it’s an experience, a primal connection to the hearth and home. There’s an undeniable magic in transforming simple ingredients – flour, water, yeast, and salt – into a golden, crusty masterpiece that fills your kitchen with an aroma that’s utterly non-intoxicating. We all love homemade bread because it speaks to something deep within us, a yearning for comfort, for a taste of tradition, and for the satisfaction of creating something nourishing with our own two hands. It’s the perfect accompaniment to a hearty soup, a delicious base for a sandwich, or simply a delight to tear into warm and slathered with butter. What makes our particular approach to homemade bread so special is its approachability. We’re going to demystify the process, proving that you don’t need to be a professional baker to achieve spectacular results. Get ready to unlock the secrets to perfect loaves, every single time!
The Joy of Baking: Your Guide to Perfectly Homemade Bread
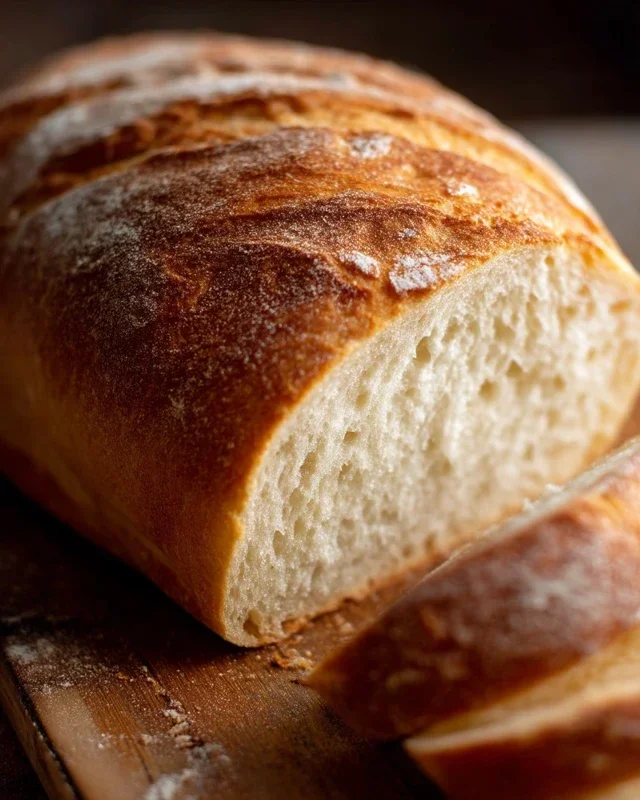
There’s a certain magic that fills the air when a loaf of freshly baked bread emerges from the oven. The aroma alone is enough to transport you to a place of comfort and warmth. And the best part? You can recreate this magic right in your own kitchen. Making bread from scratch might seem daunting, but with this simple recipe and a little patience, you’ll be pulling golden-brown, crusty loaves out of your oven in no time. Forget those store-bought imposters; the taste and texture of homemade bread are simply unparalleled.
Ingredients:
*Note on flour and yeast: For the best results, I highly recommend using bread flour as it contains more gluten, which will give your bread a chewier texture and better structure. Active dry yeast is readily available and works wonderfully. Ensure your yeast is fresh for proper activation.
Let’s Get Baking!
Step 1: Activating the Yeast and Creating the Starter
The first crucial step is to awaken your yeast. In a large mixing bowl, combine the warm water and your chosen sweetener (honey or sugar). Whisk it gently until it’s dissolved. Now, sprinkle the active dry yeast over the surface of the liquid. Don’t stir it in immediately. Let it sit for about 5-10 minutes. You’ll know the yeast is alive and active when it starts to foam and form a creamy layer on top. This “blooming” process is a good indicator that your yeast is ready to work its magic. If you don’t see any foam, your yeast might be old, or the water was too hot or too cold. In that case, it’s best to start over with fresh yeast and correctly tempered water.
Step 2: Mixing the Dough
Once your yeast is bubbly and active, it’s time to add the other wet ingredients and the salt. Add the oil and salt to the yeast mixture and give it a gentle stir. Now, gradually start adding the flour. Begin extract by adding about 4 cups of flour, stirring with a wooden spoon or a sturdy spatula until it’s just combined. The dough will be shaggy and sticky at this stage. As you continue to add flour, you’ll notice the dough starting to pull away from the sides of the bowl. This is where the amount of flour can vary. You’re aiming for a dough that is still slightly tacky but no longer sticking to your hands excessively. It’s better to add flour a little at a time rather than all at once to avoid a dry, tough loaf. If using a stand mixer, you can switch to the dough hook attachment at this point.
Step 3: Kneading the Dough to Develop Gluten
This is arguably the most important step for achieving a great bread texture. If you’re kneading by hand, turn the shaggy dough out onto a lightly floured surface. Begin extract to push the dough away from you with the heels of your hands, then fold it back over itself. Rotate the dough a quarter turn and repeat. Continue this rhythmic pushing, folding, and turning for about 8-10 minutes. You’re looking for a smooth, elastic dough that springs back when you gently poke it. If the dough is too sticky, add a little more flour, a tablespoon at a time. If it feels too dry, you can dampen your hands slightly with water. If using a stand mixer, knead on medium-low speed for about 5-7 minutes until the dough is smooth and elastic. The process of kneading develops the gluten strands within the flour, which are responsible for the bread’s structure and chegrape juicess.
Step 4: The First Rise (Proofing)**
Lightly grease a clean, large bowl with a little oil. Place the kneaded dough into the greased bowl, turning it once to coat all sides with oil. Cover the bowl tightly with plastic wrap or a clean, damp kitchen towel. Place the bowl in a warm, draft-free place to rise. An oven that has been turned off but still retains some warmth is ideal, or simply a sunny spot on your counter. Let the dough rise for about 1 to 1.5 hours, or until it has doubled in size. This is called the first proofing stage. The yeast will ferment, producing carbon dioxide gas that creates those lovely air pockets, giving the bread its airy texture. Resist the urge to poke and prod it too much during this time; let it do its work!
Step 5: Shaping and the Second Rise
Once the dough has doubled in size, gently punch it down to release the air. Turn the dough out onto a lightly floured surface again. Now, it’s time to shape your loaf. You can form it into a classic round boule, an oblong loaf for a loaf pan, or even smaller rolls. For a boule, gently tuck the edges of the dough underneath to create tension on the surface. If using a loaf pan, grease it well and place the shaped dough inside, seam-side down. Cover the shaped dough loosely with plastic wrap or a clean towel and let it rise for another 30-45 minutes, or until it has nearly doubled in size again. This is the second proofing stage, which ensures a light and airy final crum extractb.
Step 6: Baking to Perfection
Preheat your oven to 375 degrees Fahrenheit (190 degrees Celsius) during the last 15-20 minutes of the second rise. If you like a crisper crust, you can place a shallow pan of water on the bottom rack of your oven to create steam while the bread bakes. Once the oven is preheated and the dough has had its second rise, carefully place the loaf (or loaves) into the oven. Bake for 30-40 minutes for a large loaf, or 20-25 minutes for smaller rolls, until the crust is a deep golden brown and the loaf sounds hollow when tapped on the bottom. If the crust is browning too quickly, you can tent it loosely with aluminum foil.
Cooling and Enjoying
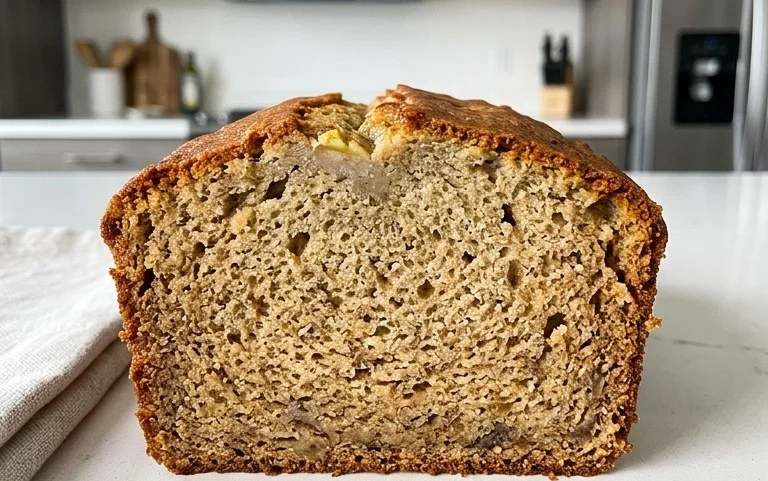
This is perhaps the hardest part of the whole process: waiting for the bread to cool! Once it’s out of the oven, transfer the loaf to a wire rack to cool completely. This allows the steam trapped inside to escape and the internal structure of the bread to set. Slicing into a hot loaf can result in a gummy texture. Be patient, and you’ll be rewarded with the most delicious, satisfying slice of homemade bread you’ve ever tasted. Enjoy it with butter, jam, or as the perfect accompaniment to any meal!
Conclusion:
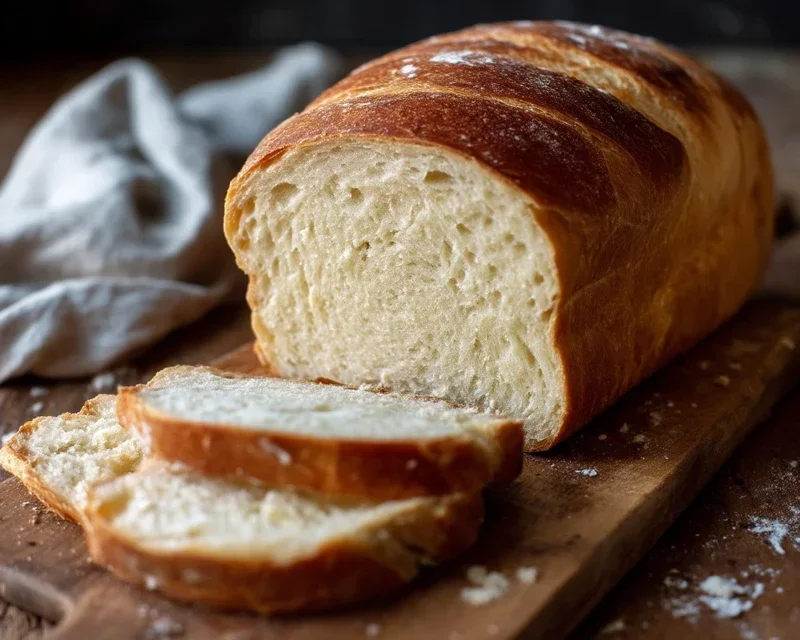
Embarking on the journey of making homemade bread is incredibly rewarding, and this recipe makes it delightfully accessible for everyone. The beauty of this approach lies in its simplicity and the unparalleled satisfaction of pulling a golden-brown, fragrant loaf from your own oven. You’ll discover a tenderness and depth of flavor that store-bought options simply can’t match. From the initial rise to the final crusty bite, it’s a process that engages the senses and fills your home with an irresistible aroma. This versatile loaf is perfect for so many occasions – think hearty sandwiches piled high with your favorite fillings, crunchy toast slathered with butter and jam for breakfast, or as a delightful accompaniment to soups and stews. Don’t be afraid to experiment! You can easily incorporate herbs, seeds, or even a touch of honey for a slightly sweeter variation. The possibilities are truly endless.
So, I wholeheartedly encourage you to give this homemade bread recipe a try. It’s more than just baking; it’s about creating something truly special with your own two hands. The sense of accomplishment is immense, and the taste is simply divine. Enjoy every delicious slice!
Frequently Asked Questions:
Why is my homemade bread dense instead of fluffy?
A common culprit for dense bread is insufficient kneading or proofing. Ensure you’ve developed the gluten properly during kneading, and allow the dough to rise in a warm place until it has doubled in size. Over-handling the dough after its first rise can also deflate it.
Can I freeze leftover homemade bread?
Absolutely! Once completely cooled, wrap your homemade bread tightly in plastic wrap followed by a layer of foil or place it in a freezer-safe bag. It can be frozen for up to 2-3 months. Thaw it at room temperature and reheat slices in a toaster or oven if desired.
What kind of flour is best for homemade bread?
For this recipe, a good all-purpose flour will work wonderfully. However, if you’re looking for a chewier crust and a more robust flavor, consider using bread flour. Bread flour has a higher protein content, which contributes to better gluten development.
Homemade Bread
A simple recipe for delicious homemade bread, perfect for sandwiches or toast. This recipe uses common pantry staples and is easy to follow.
Ingredients
-
2 cups warm water (105-115 degrees Fahrenheit)
-
1 Tablespoon active dry yeast
-
1/4 cup honey
-
2 teaspoons salt
-
2 Tablespoons canola oil
-
4 – 5 1/2 cups all-purpose flour
Instructions
-
Step 1
In a large bowl, combine the warm water and honey. Sprinkle the active dry yeast over the mixture and let it sit for about 5-10 minutes until foamy. -
Step 2
Add the salt and canola oil to the yeast mixture. Stir to combine. -
Step 3
Gradually add the flour, starting with 4 cups, mixing until a shaggy dough forms. If the dough is too sticky, add more flour, about 1/2 cup at a time, until it pulls away from the sides of the bowl. -
Step 4
Turn the dough out onto a lightly floured surface and knead for 8-10 minutes until smooth and elastic. Alternatively, use a stand mixer with a dough hook. -
Step 5
Place the dough in a lightly oiled bowl, turning to coat. Cover with plastic wrap or a clean kitchen towel and let rise in a warm place for 1-1.5 hours, or until doubled in size. -
Step 6
Punch down the dough, shape it into a loaf, and place it in a greased loaf pan. Cover and let rise again for 30-45 minutes. -
Step 7
Preheat your oven to 375 degrees Fahrenheit (190 degrees Celsius). Bake the bread for 30-35 minutes, or until golden brown and the internal temperature reaches 190-200 degrees Fahrenheit (88-93 degrees Celsius). -
Step 8
Remove the bread from the oven and let it cool on a wire rack before slicing and serving.
Important Information
Nutrition Facts (Per Serving)
It is important to consider this information as approximate and not to use it as definitive health advice.
Allergy Information
Please check ingredients for potential allergens and consult a health professional if in doubt.